Table of Contents
What Is the Shopify App Store?
The Shopify App Store is the official marketplace built and maintained by Shopify, where merchants can discover, install, and manage third-party applications that extend the capabilities of their online store. Launched alongside Shopify’s platform ecosystem, it has grown into one of the largest e-commerce app marketplaces in the world, currently hosting over 16,000 apps built by independent developers and companies from around the globe.
At its core, the App Store exists because no single platform can do everything every merchant needs. Shopify covers the fundamentals: product listings, checkout, payments, and basic order management. But the moment a business wants to do something more specific, like send automated review request emails three days after delivery, offer bundle discounts at cart, display a size guide on product pages, or sync inventory with Amazon, it needs an app. The App Store is where all of that lives.
How It Works
The App Store operates on a partner model. Developers build apps using Shopify’s public APIs and submit them for review. Shopify evaluates each app against a 100-point checklist covering performance, security, design quality, and how well it integrates with the Shopify admin and storefront. Only apps that pass this review get listed. Once listed, apps connect to a merchant’s store through an OAuth-based permission system, meaning you explicitly approve what data and store functions each app can access before it is installed.
Apps communicate with your store in two main ways. Some work entirely in the backend, reading and writing data through Shopify’s API without touching your storefront at all. Others embed directly into your theme, adding visible elements like review widgets, sticky add-to-cart bars, countdown timers, or chat windows. Some do both.
Who Builds These Apps
The developer ecosystem behind the App Store is vast. It includes large SaaS companies like Klaviyo, Gorgias, and Recharge that have built dedicated Shopify integrations alongside their own platforms. It also includes hundreds of smaller independent developers who built focused, single-purpose apps. Shopify itself publishes a range of first-party apps under the “Made by Shopify” label, covering things like workflow automation (Shopify Flow), influencer partnerships (Shopify Collabs), and checkout customisation (Shopify Checkout Blocks).
Pricing Models
Apps on the Shopify App Store use several different pricing structures, and understanding them upfront saves surprises on your billing.
Free apps have no cost at all and are fully functional without any payment. Many of Shopify’s own apps fall into this category.
Freemium apps offer a free tier with limited features and paid tiers that unlock more functionality. This is the most common model. The free plan is often genuinely useful for small stores, while growing stores eventually need to upgrade.
Free to install is a specific label that means there is no subscription fee, but the app charges based on usage. This is common for shipping apps, payment processors, and print-on-demand services that take a per-transaction or per-order fee instead of a flat monthly charge.
Paid plans are straightforward monthly or annual subscriptions. Prices range from a few dollars per month for simple utility apps to several hundred dollars per month for enterprise-grade tools like loyalty platforms or advanced analytics suites.
Usage-based billing charges you proportionally to how much you use the app, such as the number of emails sent, orders processed, or SMS messages delivered.
Most paid apps offer a free trial period, typically between 7 and 30 days, so you can evaluate them before committing.
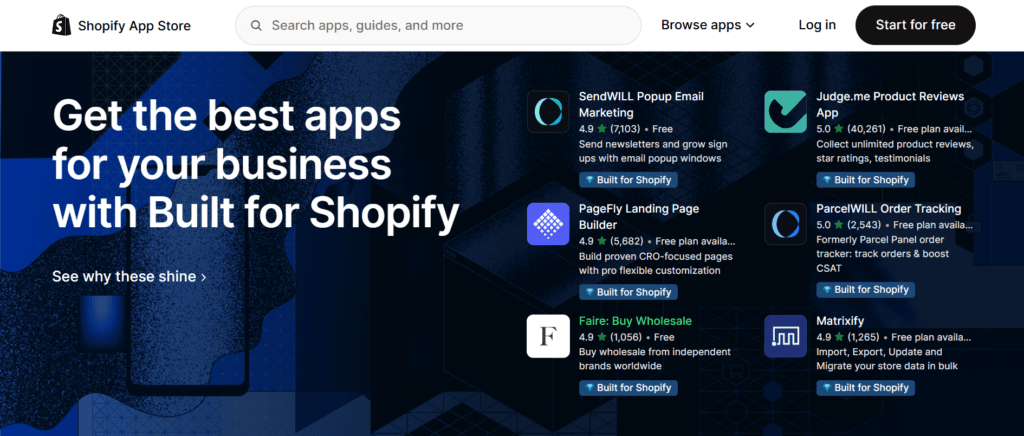
The Built for Shopify Badge
One of the most useful signals in the App Store is the Built for Shopify badge. Shopify introduced this designation to highlight apps that go beyond the basic listing requirements and meet a higher bar of quality. To earn it, an app must use Shopify’s latest APIs, load without slowing down the storefront, follow Shopify’s design guidelines so the experience feels native, and maintain strong merchant support ratings. If you are evaluating two similar apps and one has this badge, it is almost always the safer choice.
App Categories at a Glance
The App Store is organised into seven top-level categories, each covering a distinct area of store operations.
Sales channels contain apps that connect your store to external selling platforms and marketplaces, including Amazon, eBay, Google Shopping, Facebook, Instagram, TikTok, and point-of-sale systems for physical retail.
Finding products covers the supply side of your business. This is where you find dropshipping integrations, print-on-demand fulfilment partners, and wholesale supplier networks to source inventory without holding stock yourself.
Selling products focuses on how products are sold and delivered. This includes subscription billing apps, digital download delivery, product customisation tools (like letting customers engrave text or upload images), and buy-now-pay-later payment options.
Orders and shipping handle everything after the sale. Order tracking pages, shipping label generation, customs documentation, returns management, invoices, and packing slip printers all live here.
Store design is broader than it sounds. Beyond visual customisation, it includes SEO optimisation tools, storefront translation and localisation, currency conversion, accessibility improvements, and trust badges.
Marketing and conversion are typically the most visited categories for growing stores. Product review apps, loyalty and rewards programs, email and SMS marketing, exit-intent popups, upsell and cross-sell widgets, bundle builders, and referral programs are all found here.
Store management covers the operational layer: customer support chat, helpdesk integrations, FAQ builders, analytics and reporting tools, inventory management, and workflow automation platforms.
Why It Matters for Your Business
For a small store just starting out, the App Store provides access to enterprise-grade tools at accessible price points. A solo founder can set up sophisticated post-purchase email flows, automated review collection, and loyalty programs using apps that would have required custom development just a decade ago.
For larger stores, it provides a way to extend Shopify’s native functionality without rebuilding the platform. Instead of custom-coding a subscription billing engine, you install Recharge. Instead of building a custom returns portal, you install Loop Returns. The App Store compresses months of development work into an afternoon of configuration.
The tradeoff is that every app you add introduces a dependency on a third-party developer, a potential performance cost, and an additional line on your monthly bill. The goal is not to install as many apps as possible, but to build a lean stack where each app is genuinely earning its place.
The Shopify App Store is where your store goes from basic to powerful. With over 16,000 apps covering everything from email marketing to order tracking, knowing how to navigate it well can save you hours and meaningfully grow your revenue. This guide walks you through the entire process, from finding the right apps to getting them live in your store.
Before You Start: What You Need
To install apps from the Shopify App Store, you need an active Shopify store. If you do not have one yet, you can start a free 3-day trial at shopify.com. Once your store is created, your admin URL will look like yourstore.myshopify.com/admin.
You will also want to have a clear idea of what problem you are trying to solve before browsing. The App Store is large, and going in without a goal makes it easy to install apps you do not need.
Step 1: Access the Shopify App Store
There are two ways to get there.
From your Shopify Admin:
- Log in to your store at yourstore.myshopify.com/admin
- In the left sidebar, click Apps
- Click the Shopify App Store at the top of the page
Directly from the browser:
- Go to apps.shopify.com
- Click Log in in the top right corner
- Enter your store URL (e.g., yourstore.myshopify.com) and click Log in
Step 2: Navigate the App Store
The homepage organises apps into seven main categories. Understanding them up front saves time.
Sales channels cover apps that sync your products with Amazon, Google Shopping, Facebook, Instagram, and other external marketplaces.
Finding products is for sourcing inventory through dropshipping suppliers, print-on-demand services, and wholesale networks.
Selling products handles subscriptions, digital downloads, product customisation options, and payment flexibility.
Orders and shipping include order tracking, label printing, invoices, and fulfilment automation.
Store design covers SEO tools, translation, currency converters, and storefront customisation.
Marketing and conversion is one of the most active categories, with apps for product reviews, upsells, bundles, email marketing, and checkout optimisation.
Store management brings in analytics, customer support chat, FAQs, and workflow automation tools.
Use the top search bar to find something specific, or browse categories if you are still exploring.
Step 3: Evaluate Apps Before Installing
Not every app is equal. Here is how to vet them properly before committing.
Check the Built for Shopify badge. Shopify awards this to apps that pass a rigorous 100-point review for performance, design, and integration quality. These are the safest starting points for any category.
Read the reviews. Look at the overall rating, but more importantly, read the recent one-star and two-star reviews. They will surface common complaints and deal-breakers faster than the five-star ones.
Review the pricing carefully. Most apps have tiered plans. Some list as “Free to install” but charge usage fees or lock core features behind paid tiers. Click through to the pricing section before installing.
Read the app’s Privacy Policy. The install screen includes a direct link to the app developer’s Privacy Policy. Review it before installing to understand how they handle your store and customer data.
Understand what data access it needs. The install screen shows two specific categories of access: “View personal data” (covering customers, store owners, and blog contributors) and “View and edit store data” (covering products, orders, discounts, gift cards, analytics, and more). You can expand each category to see the exact permissions being requested.
Check the last updated date. An app that has not been updated in over a year may have compatibility issues with newer Shopify API versions or theme standards.
Look at the developer’s other apps. A developer with multiple well-reviewed apps is generally more reliable than one with a single listing.
Step 4: Install an App
Once you have chosen an app:
- Log in to the Shopify App Store at apps.shopify.com
- Search for the app and click its listing
- On the app listing page, click Install
- On the Install app screen, review the two categories of data access: View personal data and View and edit store data. Expand each to see the specific permissions being requested.
- Review the link to the app developer’s Privacy Policy on the same screen
- Click Install to authorise and complete the installation
After the app is installed, you can view and access it from the Apps page in your Shopify admin.
Note on third-party install links: Some apps are installed via a direct link from a developer’s website rather than through the App Store. This method only works for apps created before December 5, 2019. When installing this way, you will see a warning that the app has not gone through Shopify’s verification process. This does not automatically mean the app is unsafe, but proceed with extra caution.
Note on custom apps: If a developer has built a custom app specifically for your store, they will provide you with a unique installation link. These links are store-specific and expire after seven days for security reasons. If your link expires, ask the developer for a new one.
Step 5: Configure the App
Every app has its own setup flow, but most follow a similar pattern.
Connect your account. If the app has its own platform (like Klaviyo, Judge.me, or Gorgias), you will be prompted to log in or create an account.
Complete the onboarding wizard. Most quality apps include a step-by-step setup flow. Go through it fully rather than skipping to settings, as it often handles the critical configurations automatically.
Set up theme integration if required. Apps that add visible elements to your storefront (review widgets, sticky carts, upsell popups) usually need to be embedded in your theme. This is done through Shopify’s Theme Editor (Online Store > Themes > Customise), where you will find the app’s blocks or sections available to place.
Add app blocks to your Shopify admin pages. Some apps support blocks that appear directly on your Products, Orders, and Customers pages inside the admin for quick access to app features. To add one, go to the relevant admin page (for example, the Products page), look for the Blocks section, click + Block, and select the app block you want. You can pin a block to make it permanently visible for all staff in your store. Note that not all apps support this feature.
Configure notifications and triggers. For apps involving automation (abandoned cart, order tracking emails, review request sequences), set up when and how they fire. Default settings are rarely optimal for your specific store.
Test before going live. Place a test order or use the app’s preview mode to confirm it is working correctly before real customers interact with it.
Step 6: Manage Your Installed Apps
You can view and manage all installed apps from Admin > Apps.
To remove an app:
- Go to Admin > Apps
- Click the three-dot menu next to the app
- Select Delete
- Confirm the deletion
Removing an app does not automatically clean up any code or settings it added to your theme. For apps that modified your theme, go to Online Store > Themes > Edit code and check for leftover app blocks or liquid snippets. Many apps also leave behind data in your Shopify admin even after deletion.
Tip: If you only want to pause an app temporarily without losing its configuration, check whether it has an internal pause or deactivation toggle inside its own settings.
Step 7: Monitor App Performance
After installation, track whether each app is actually contributing.
For conversion-related apps (reviews, upsells, popups), check their built-in analytics dashboards for click rates, conversion lifts, and revenue attribution.
For store speed, use Shopify’s built-in Online Store Speed report (Online Store > Themes > Speed) to see if any apps have impacted page load time. Some apps, particularly those that add front-end scripts, can noticeably slow your store.
For apps with recurring charges, audit your app spend every quarter. It is common to accumulate subscriptions for apps that are no longer actively contributing to the store.
Common Mistakes to Avoid
Installing too many apps at once. Each app adds load to your store and makes it harder to diagnose what is causing issues. Add one at a time and test.
Ignoring the permissions screen. Some apps request broad access they do not need. If something looks excessive for what the app does, look for an alternative.
Not removing leftover theme code after deleting an app. This is a frequent cause of broken layouts and slow store speeds.
Choosing apps based on install count alone. A high install count from several years ago does not reflect current quality. Filter for recent reviews.
Skipping the free trial. Most premium apps offer a 7-to-14-day free trial. Always test before paying.
Frequently Asked Questions
Yes. During Shopify’s 3-day free trial, you can install and configure apps. However, apps with their own paid plans will still require you to enter billing details separately. Any app charges only activate once your Shopify trial ends and you pick a paid Shopify plan.
Yes, it can. Apps that inject JavaScript into your storefront (popups, chat widgets, review widgets, tracking scripts) each add load time. Shopify’s Online Store Speed report under Online Store > Themes > Speed shows your current score and flags which scripts are contributing most to slowdowns. As a rule, audit your installed apps every quarter and remove anything you are not actively using.
Shopify allows apps to retain the data they collected for a limited period after deletion, as governed by Shopify’s partner data policies. However, any theme code the app injected (Liquid snippets, app blocks, CSS) is not automatically removed. You need to manually go to Online Store > Themes > Edit Code and remove leftover references, you may see broken sections or unnecessary script calls on your storefront.
Not necessarily. “Free to install” means there is no monthly subscription fee, but the app typically earns revenue through per-transaction fees, revenue share, or usage-based charges. For example, a print-on-demand app listed as free to install will charge you the base product cost for every order fulfilled. Always click through to the Pricing section on the app listing page and read the fine print before installing.
Yes, conflicts do happen. The most common issues occur when two apps modify the same part of the theme (for example, two apps both trying to control the cart drawer), when multiple apps inject competing scripts that interfere with each other, or when apps use outdated API versions that clash with newer integrations. If you notice unexpected behaviour after installing a new app, the standard diagnostic is to disable the newest app and check if the issue resolves. Shopify’s support team can also help identify conflicts through their theme inspector tools.
Final Thoughts
The Shopify App Store is genuinely powerful when used intentionally. The best approach is to identify one specific problem, find the highest-rated app with the Built for Shopify badge in that category, test it thoroughly, and only then move on to the next gap. A lean, well-configured stack of five focused apps will consistently outperform twenty half-configured ones.
Start at apps.shopify.com and take it one step at a time.